Set Up Custom 404 Page: Stop Losing Visitors
How To Set Up Your Custom 404 Page NOW
Alright, let’s cut the crap. You’ve got a website, and inevitably, people are gonna stumble. Not because your content sucks (hopefully), but because links break, pages move, or they butcher the URL typing it in.
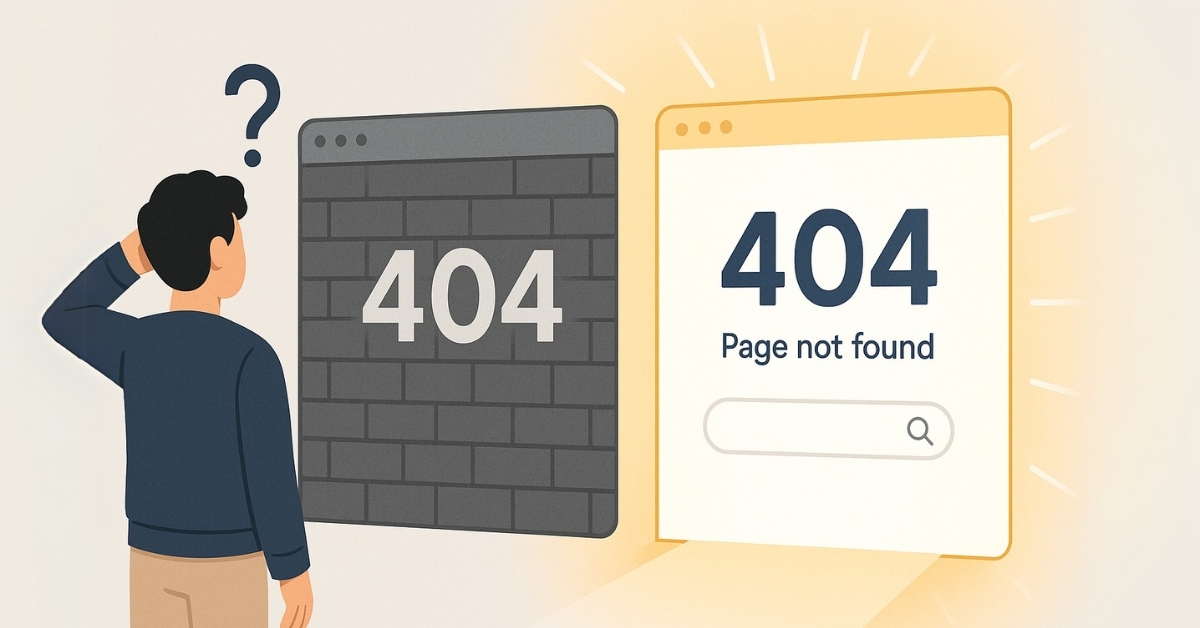
When that happens, most websites hit visitors with the digital equivalent of a brick wall: a generic, ugly, unhelpful 404 Error Page.
This is costing you money and credibility.
Please stop it.
You need a custom 404 error page on your hosting account. This isn’t just about looking pretty; it’s a strategic move. It’s about turning a potential dead end into a second chance.
We’re gonna break down exactly how to set this up, why it’s non-negotiable for your site’s health and growth, and how to make yours actually work for you, not against you. We’ll use the keywords and structure that help Google (and potential customers) find you, and we’ll do it in a way that makes sense, even if you’re not a tech wizard.
What Exactly IS a 404 Error (And Why Should You Care)?
Let’s define it clearly.

404 Not Found error
A 404 Not Found error is an HTTP status code the server sends to a browser when the browser requests a page (or other resource) that cannot be found. Think of it as the server saying, “Yeah, I looked everywhere you told me to, but that thing? Not here.”
Simple enough, right? The default page your hosting provider gives you when this happens is usually bland, often confusing, and offers zero help to the lost visitor.
Here’s the deal
Every time someone hits that default page, they’re likely gone forever. Bounce rate spikes. User experience tanks. Google sees people leaving immediately, and that’s a bad signal. You just wasted the effort it took to get them there.
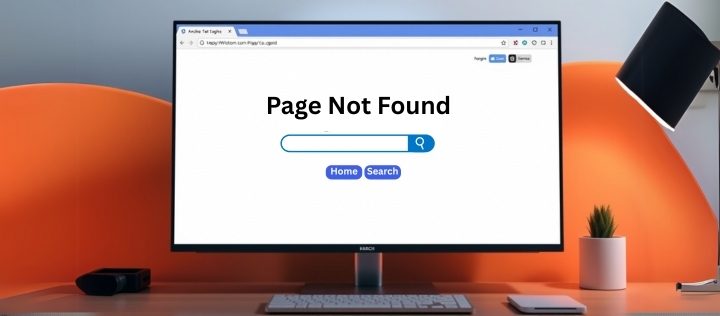
A custom 404 error page, on the other hand, is a page you design and control. It replaces that generic message with something helpful, on-brand, and designed to keep the visitor on your site.
“It’s your website’s way of saying, “Oops, my bad! Let me help you find what you need.“
This is a critical element often overlooked. People spend hours optimizing landing pages but neglect the page visitors see when things go wrong. That’s insane.
How Does Setting Up a Custom 404 Page Work? The Technical Guts (Simplified)
At a basic level, setting up a custom 404-page hosting involves telling your web server (like Apache or Nginx, which your hosting provider runs) which specific file to show whenever it encounters a 404 error.
The two most common methods you’ll encounter, especially on shared hosting account types (like those offered by Webhostifier and many others), are
1. Using Your Hosting Control Panel (Like cPanel or Plesk)
Many hosting providers give you a user-friendly interface. There’s usually a section specifically for “Error Pages” or “Custom Error Pages.” You select the “404” error code and tell it to load a specific HTML file you’ve created and uploaded. The panel then configures the server settings for you behind the scenes.
2. Using the “.htaccess” File
This is a powerful configuration file used by Apache servers (widespread). You can add a specific line of code to the “.htaccess” file in your website’s root directory (public HTML or www). This line of code points the server to your custom 404-page file.
We’ll dive into the practical steps for both of these in a moment.
The Non-Negotiable Benefits of a Custom 404 Page
Why bother? Because this isn’t just busywork. It directly impacts your bottom line and online presence.

1. Improves User Experience (UX)
This is massive. A helpful, on-brand 404 page reduces frustration. Instead of hitting a dead end, visitors are guided back into your site. They feel you care. This keeps them engaged and reduces that dreaded bounce rate (LSI).
2. Maintains Branding Consistency
Your custom page should look and feel like the rest of your site. The default page breaks that experience completely. A consistent brand builds trust.
3. Boosts Your SEO (Indirectly but Critically)
i) Correct Status Code
A properly configured custom 404 page must return a 404 HTTP status code. This tells search engines the page is genuinely missing. A poorly set up custom page might return a 200 (OK) status, confusing search engines into thinking the non-existent page is real. This leads to “soft 404s,” which waste crawl budget (LSI) and can hurt your rankings.
ii) Reduced Bounce Rate
As mentioned, keeping users on-site signals engagement with Google.
ii) Improved Site Health
While a few 404s are standard, an excessive number of persistent unaddressed ones can signal poor site maintenance to Google, potentially impacting trust and rankings.
iv) Link Equity
If an external site links to a page on your site that’s gone, that link equity (ranking power) is lost if the page hits a generic 404. While the 404 page itself doesn’t recover the lost equity for that specific URL, a good 404 page keeps the visitor on your site, potentially engaging with other content, which is always a win for overall site authority. (We’ll talk about redirects later – the real way to preserve link equity).
4. Provides Navigation & Recovery
You can add a search bar, links to popular pages, categories, or your homepage. You help the user find what they were looking for or discover something else valuable.
5. Gathers Insights
By tracking traffic to your 404 page (via Google Analytics), you can identify which broken links are being hit most often. This tells you which links need fixing (broken links LSI) or which deleted content might still be in demand.
6. Marketing Opportunity
Get creative! Inject personality, add a call to action (sign up for the newsletter, check out a new product), or even add a bit of humor (if it fits your brand).
See? It’s not just a nice-to-have. It’s foundational.
Limitations
What a Custom 404 Page Can’t Do
Let’s bust a common myth right now: Setting up a custom 404 page does NOT fix the broken link that caused the error.
The custom error page handles the result of the error (what the user sees), but it doesn’t address the underlying problem (why the link was broken in the first place).
If you have internal links pointing to pages that don’t exist, or if you’ve deleted a page that had backlinks, you need to implement 301 redirects. This is the proper SEO way to send users and search engine bots from an old, dead URL to a new, relevant one.
Think of the custom 404 page as damage control and a helpful guide, not the repair crew.
Practical Application: Where and How to Use This
Every single website needs a custom 404 page. Period. Doesn’t matter if it’s a simple blog, a sprawling e-commerce store, or a corporate site. Visitors will inevitably hit dead ends.
For Webhostifier.com users or anyone else on shared hosting, the methods below are your go-to.
Method 1: The Control Panel Way (Often the Easiest)
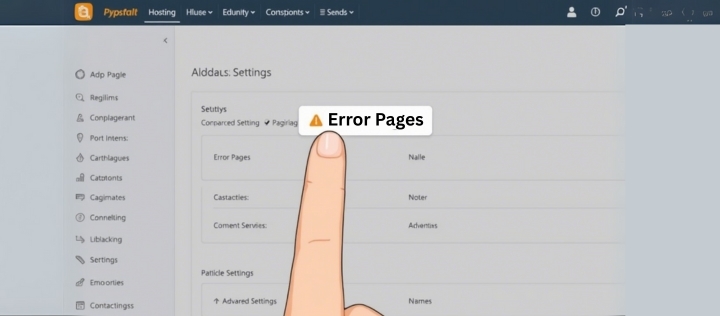
Most hosting control panels simplify this. Webhostifier provides cPanel (a widespread panel). The steps are usually something like this.
- Log in to your cPanel account. (Access details provided by Webhostifier).
- Find the “Error Pages” icon. It’s often in the “Advanced” or “Metrics” section. Click it.
- Select the domain you want to manage the error pages for (if you have multiple).
- Click on the “404 (Not Found)” link. This opens an editor.
- Enter your custom HTML for the 404 page. You can build this page beforehand in a simple HTML editor or even use a visual editor provided by the panel.
- Include text like “Page Not Found,” explain why (link broken, page moved, typo), and offer help.
- Add links: Homepage, Search page (<a href=”/search”>Search</a>), main categories, contact page.
- Ensure it matches your site’s look and feel (CSS styling).
- Click “Save.”
That’s it. The control panel handles the server ErrorDocument 404 configuration for you.
Method 2: The “.htaccess” Way (More Universal & Flexible)

This method works if your hosting uses Apache and allows .htaccess files (most do, including typical shared hosting environments).
- Create your custom 404-page file. Design the HTML content for your 404 page. Save this file as something easily identifiable, like 404.html or custom-404-page.html. Make it helpful and match your site design (as discussed in the design section below).
- Upload this file to the root directory of your website (public HTML). You can use cPanel’s File Manager or an FTP client.
- Locate or create the “.htaccess file” in your website’s root directory (public HTML).
- In File Manager, you might need to enable “Show Hidden Files” in settings to see .htaccess as it starts with a dot.
- If it doesn’t exist, click “+File” and name it .htaccess (yes, just the dot and the name, no file extension).
- Edit the .htaccess file.
- Add the following line:
Apache
Error Document 404 /404.html
Replace /404.html with the actual path and filename of the custom 404-page file you uploaded. The / means the root directory (public HTML). If you put the file in a subfolder (e.g., /errors/404.html), the line would be Error Document 404 /errors/404.html.
Save the changes to the “.htaccess” file.
Now, when a 404 occurs, the server is instructed by .htaccess to serve the content of your specified file.
Designing Your Custom 404 Page: Make It Count
This is where you turn that potential negative into a positive interaction. Don’t just slap some text on a page.
Key Design Elements & Custom 404 Page Best Practices
i) Clear & Friendly Message
State clearly that the page wasn’t found. Use simple language. Avoid technical jargon. Inject your brand’s personality (design custom 404-page LSI).
- Bad: “HTTP Error 404: Resource Not Found”
- Good: “Oops! Page Not Found. It looks like the page you were looking for took a wrong turn.”
ii) Maintain Your Site’s Look & Feel
Use your logo, fonts, colors, and general layout. The visitor should know they’re still on your site.
iii) Provide Helpful Navigation
- Link back to your homepage (Essential!).
- Include links to your main sections, popular pages, or blog categories.
- Include a Search Bar: This is crucial. Let users search for what they were trying to find.
- Link to your contact page or support.
iv) Explain Why (Briefly)
Mention common reasons (mistyped URL, broken link, page moved/deleted).
v) Consider Your Audience
A fun, quirky page works for some brands; a more formal, helpful one for others. Match your style.
vi) Call to Action (Optional but Recommended)
What else can they do? Explore new products, read a featured article, and sign up for your list.
vii) Images/Visuals (Optional)
A relevant, non-distracting image or graphic can help keep the page loading fast. Avoid large, unnecessary images.
What to Put on Your 404 Page (Checklist)
- Clear “Page Not Found” heading (what to put on 404-page LSI)
- Brief, friendly explanation
- Link to Homepage
- Site Search Bar
- Links to key pages/categories
- Your logo and branding
- (Optional) Contact link or support info
- (Optional) Relevant visual/image
- (Optional) Creative element or call to action
Testing Your Setup: Trust, But Verify
Once you’ve set up your custom 404 page using either the control panel or .htaccess method:
- Open your web browser.
- Type in your domain followed by a URL that you know doesn’t exist. For example, yourdomain.com/this-page-definitely-does-not-exist-12345.
- Check what page loads. It should be the custom 404 page you created, not the default server error page.
- Slightly More Technical: Use your browser’s developer tools (usually F12) to check the “Network” tab and reload the non-existent URL. Look at the response headers for that request. The “Status” should be 404 Not Found. If it shows 200 OK (a soft 404) or 302 Found (a redirect, but to the wrong place), your setup isn’t correct. You need a true 404 status code.
Common Myths and Mistakes to Avoid
Myth-1: A custom 404 fixes my broken links.
Reality: No. It just handles the error gracefully. You still need to find and fix broken links (internal and external) and implement 301 redirects for moved or deleted pages. Use tools like Google Search Console’s “Coverage” report or site crawlers to find these.
Mistake 2: Making the 404 page just another dead end.
Reality: If your custom page doesn’t offer navigation or a search bar, it’s almost as useless as the default page. Help the user recover!
Mistake-3: The custom 404 page returns a 200 OK status.
Reality: This is a soft 404, and it isn’t good for SEO. Ensure your setup correctly sends the 404 Not Found status. Control panel methods usually handle this correctly, but double-check if using .htaccess or custom server configs.
Mistake 4: Making the 404 page overly complex, slow to load, or confusing.
Reality: Keep it simple, clear, and fast. The user is already slightly frustrated; don’t make it worse.
Unique Angle: Your 404 Page as a Lead Generation Micro-Site?
Think outside the box. If appropriate for your business (and carefully tested not to annoy), could your 404 page include:
- A prominent call to action for a lead magnet relevant to your core audience?
- A link to an “Oops, let us help!” contact form?
- A dynamic display of your most popular blog posts or products?
It’s a space you control when the standard user journey fails. Be creative with the second chance it offers.
Conclusion: Stop Leaving Money on the Table
Look, setting up a custom 404 error page on your hosting account is not rocket science. Whether you use the easy control panel method or the slightly more technical .htaccess approach, it’s a fundamental step in website maintenance (LSI) and optimizing user experience (LSI).
Ignoring it means frustrating visitors, potentially hurting your search engine performance, and, quite frankly, looking unprofessional.
It takes minimal effort for a significant upside. Turn that inevitable error into an opportunity. Get it done. Now.
Q&A
What is the main purpose of a custom 404 page?
A custom 404 page replaces the default server error message shown when a page is not found. Its main purpose is to improve user experience by providing helpful navigation and context, keeping visitors on the website, and maintaining branding consistency.
Does a custom 404-page help SEO?
Yes, indirectly. A properly configured custom 404 page returns the correct 404 status code, preventing soft 404s that can harm SEO. It also helps reduce bounce rate and improves user engagement, signaling site quality to search engines.
What should be included on a good custom 404 page?
An effective custom 404 page should include a clear “Page Not Found” message, a brief explanation, a link to the homepage, key navigation links, a search bar, and maintain the site’s overall branding and design.
How do I set up a custom 404 page on shared hosting (like with Webhostifier)?
You can typically set up a custom 404 page on your hosting account either through your hosting control panel’s (like cPanel) “Error Pages” section or by creating a custom HTML file and adding an Error Document 404 line to your .htaccess file in the site’s root directory.
Can a custom 404-page fix broken links?
No. A custom 404 page handles the display when a broken link is hit, but it does not fix the link itself or the underlying issue. To fix broken links and recover link equity for moved pages, you need to implement 301 redirects.